Get Started
TL;DR
Clone the repo:
git clone https://github.com/jiahuei/sparse-image-captioning.gitChange directory:
cd sparse-image-captioningInstall the package using either:
Regular:
pip install .Editable mode:
pip install -e .
Install Java 8
Test installation:
import sparse_captionRun
bash scripts/dataset/setup.shto perform dataset download, pre-processing, and feature extraction. Change theDATASET_DIRvariable in the script to your desired pathDone
Dataset Path
Change the DATASET_DIR variable in the scripts/dataset/setup.sh script to your desired path.
Requirements
The main requirements for sparse_caption are as follows:
python
pytorch
sentencepiece
torchvision
Java 8
The full list of required packages can be found requirements_base.txt and requirements.txt.
Dependency Versions
The exact dependency versions that are tested can be found in requirements_dev_base.txt and requirements_dev.txt.
Installation and Setup
Docker
Setup using Docker is the most convenient.
Clone the repo:
git clone https://github.com/jiahuei/sparse-image-captioning.gitChange directory:
cd sparse-image-captioningRun
docker build -t <YOUR_TAG> -f Dockerfile .to build the imageRun the command below to launch a container. Change
<YOUR_DATASET_PATH>to your desired path. All dataset files will be placed inside<YOUR_DATASET_PATH>.docker run -it \ --gpus all \ --ipc=host \ -v .:/workspace \ -v <YOUR_DATASET_PATH>:/datasets \ -v /tmp/.X11-unix:/tmp/.X11-unix -e DISPLAY=$DISPLAY \ --rm <YOUR_TAG>
Test installation:
import sparse_captionIn the container, run
bash /workspace/scripts/dataset/setup.shto perform dataset download, pre-processing, and feature extractionDone
Warning
Upon container launch, the sparse_caption package will be installed in editable mode.
Thus, the repository directory should be mounted to /workspace in the container.
Pip
See TL;DR
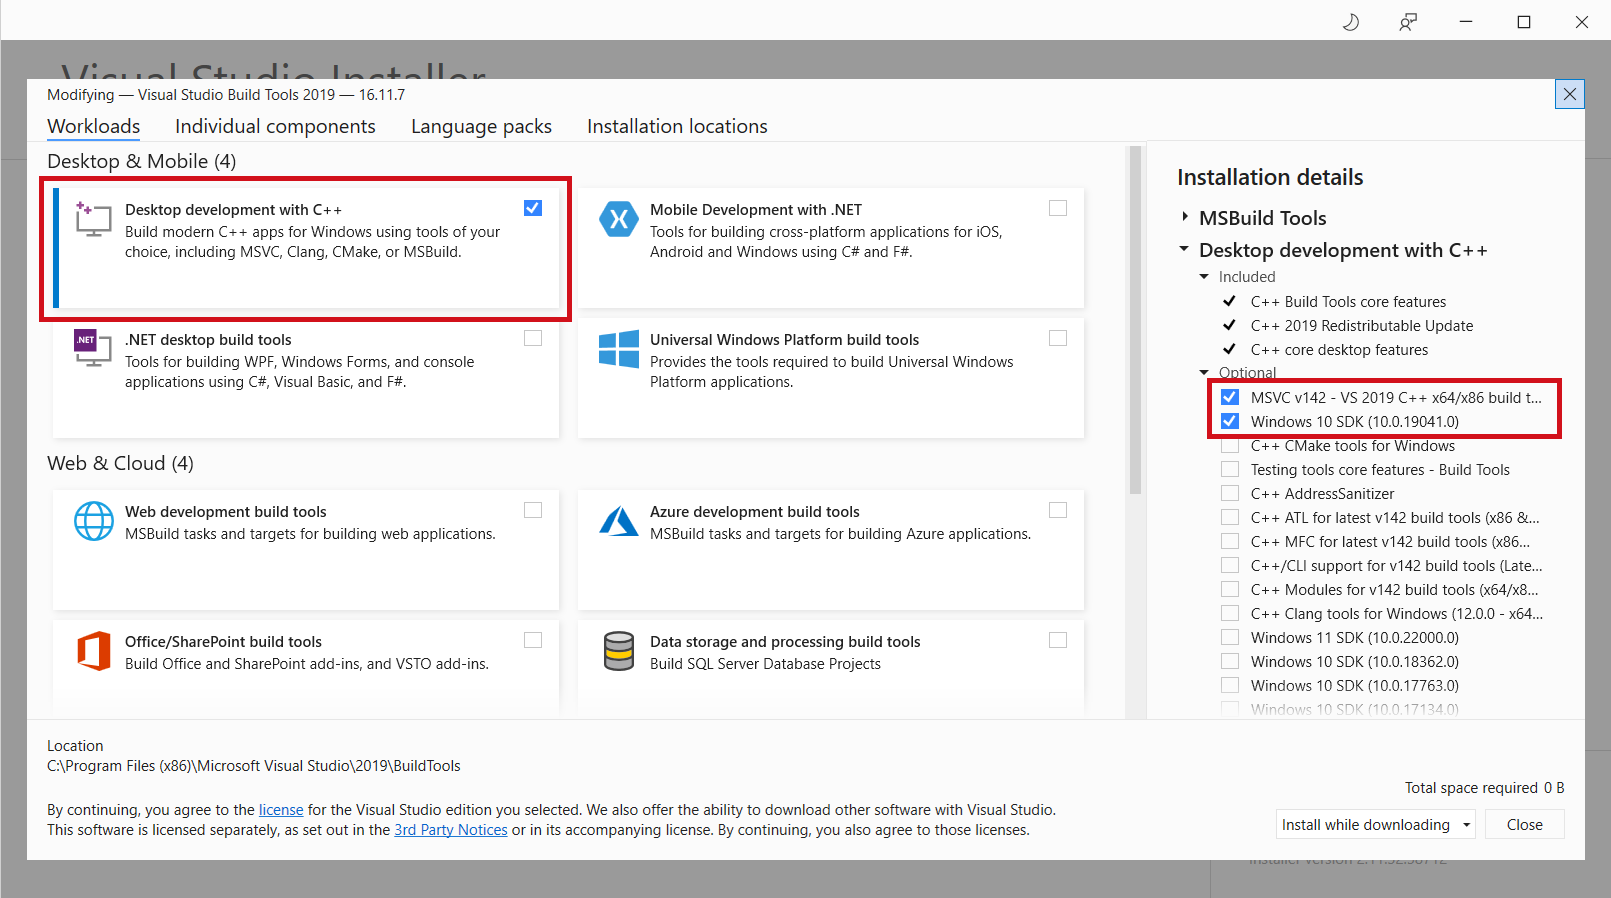
Windows
On Windows, you might need to install “Microsoft C++ Build Tools” in order to build
pycocotools, by downloading from this link.Tick the options as shown:
Anaconda
These commands should install the required packages:
conda install h5py matplotlib pandas Pillow scipy seaborn tqdm
# conda install pytorch torchvision torchaudio cudatoolkit=10.2 -c pytorch
conda install pytorch torchvision torchaudio cpuonly -c pytorch
conda install -c pytorch torchtext
conda install -c fastai sentencepiece
conda install -c conda-forge tensorboard six

# For dev, optional
conda install pytest
conda install -c conda-forge black=21.11b0 flake8 doc8 myst-parser sphinx sphinx-autobuild sphinx_rtd_theme
Follow TL;DR
Possible pycocotools installation issues
One might run into issues related to
numpyorcythonwhen importingpycocotools.To resolve it, either:
Install
numpyandcythonprior to installingpycocotoolsMaybe try using
pycocotools-fixinstead